Introduction to DIY Cardboard Cat Scratchers
The diy cardboard cat scratcher redefines pet furniture by merging affordability, sustainability, and creativity. Using discarded boxes, owners can craft functional scratching surfaces that mimic a cat’s natural urge to scratch tree bark—while keeping costs under $10.
These cardboard creations are eco-friendly: they repurpose waste, reduce landfill contributions, and decompose faster than plastic alternatives. A simple cardboard cat scratcher can be built in hours using scissors, glue, and tape—no specialized tools required. Designs vary from vertical towers for active cats to flat scratch pads for small spaces, ensuring adaptability to any home.
Customization adds value. Add sisal rope for texture, paint for aesthetics, or catnip to attract interest. Cats often prefer these creations due to cardboard’s crinkly sound and scent, making them effective at protecting furniture.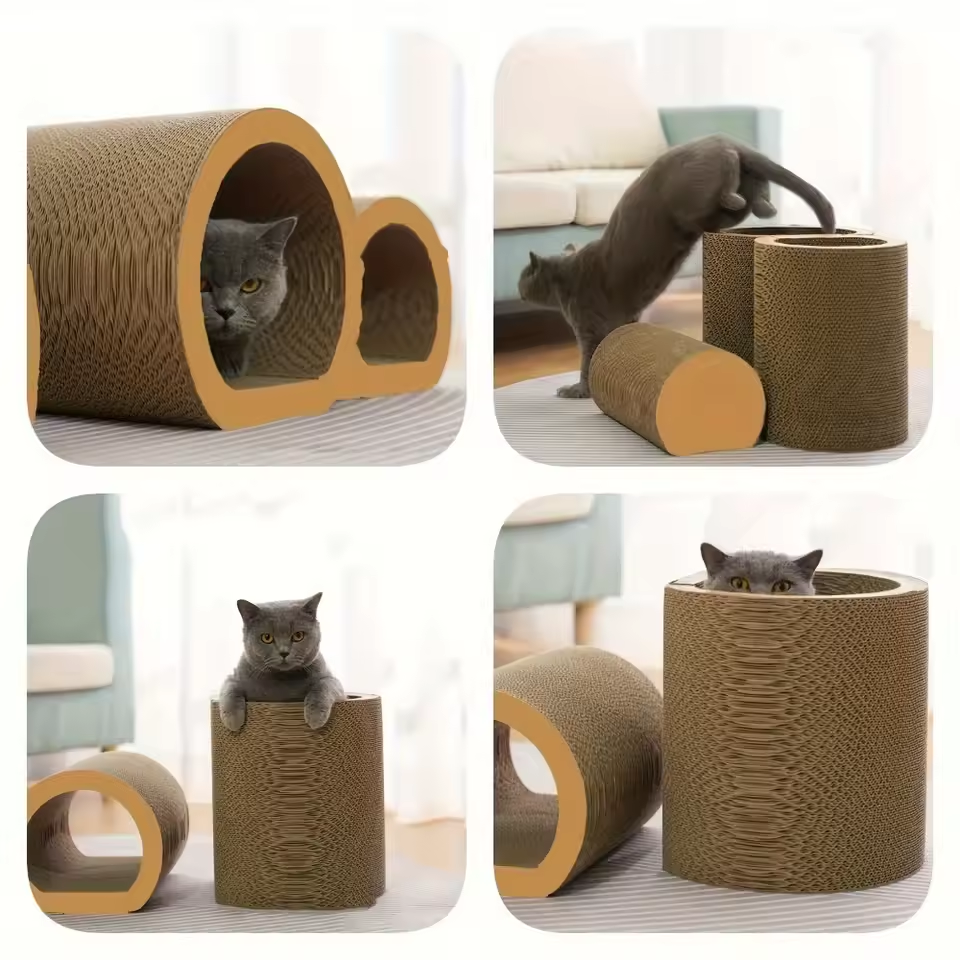
The diy cardboard cat scratcher isn’t just practical—it’s a sustainable project that empowers owners to nurture their pets and the planet. When worn out, it can be easily disassembled and composted, paving the way for endless upgrades. For under $10 and an afternoon, you can craft a solution that’s as unique as your cat.
Why Choose a DIY Cardboard Cat Scratcher?
The diy cardboard cat scratcher has emerged as a versatile solution for cat owners seeking practicality, sustainability, and creativity. Its appeal lies in its ability to transform discarded materials into functional furniture while addressing cats’ innate need to scratch. At its core, this project offers unmatched affordability—most builds cost under $10, using readily available items like old boxes, glue, and tape. Compare this to store-bought options that often require significant investment and may lack customization.
The eco-conscious angle is equally compelling. A cardboard cat scratcher repurposes waste that would otherwise end up in landfills, reducing environmental impact. Unlike plastic-based furniture, cardboard decomposes naturally, making it a guilt-free choice for conscious pet owners. Moreover, its construction allows endless creativity: you can craft vertical towers for climbers, flat pads for small spaces, or textured surfaces with sisal rope or catnip-infused glue.
This project also empowers customization to match both your cat’s preferences and your home’s aesthetics. A cat that loves heights might prefer a triangular tower built from stacked boxes, while a sunbather would enjoy a window-mounted design combining scratching posts with lounging platforms. The process itself fosters creativity—families can collaborate on painting patterns or adding dangling toys, turning it into a fun, educational activity.
Even when worn out, the diy cardboard cat scratcher remains sustainable. Its modular structure allows easy disassembly and composting, while repairs extend its lifespan. For under $10 and a few hours, you craft a solution as unique as your cat, proving that sustainable pet care doesn’t require compromise. Whether your feline favors vertical climbs or flat scratching surfaces, this project balances affordability, style, and ethics, making it a win for both pets and the planet.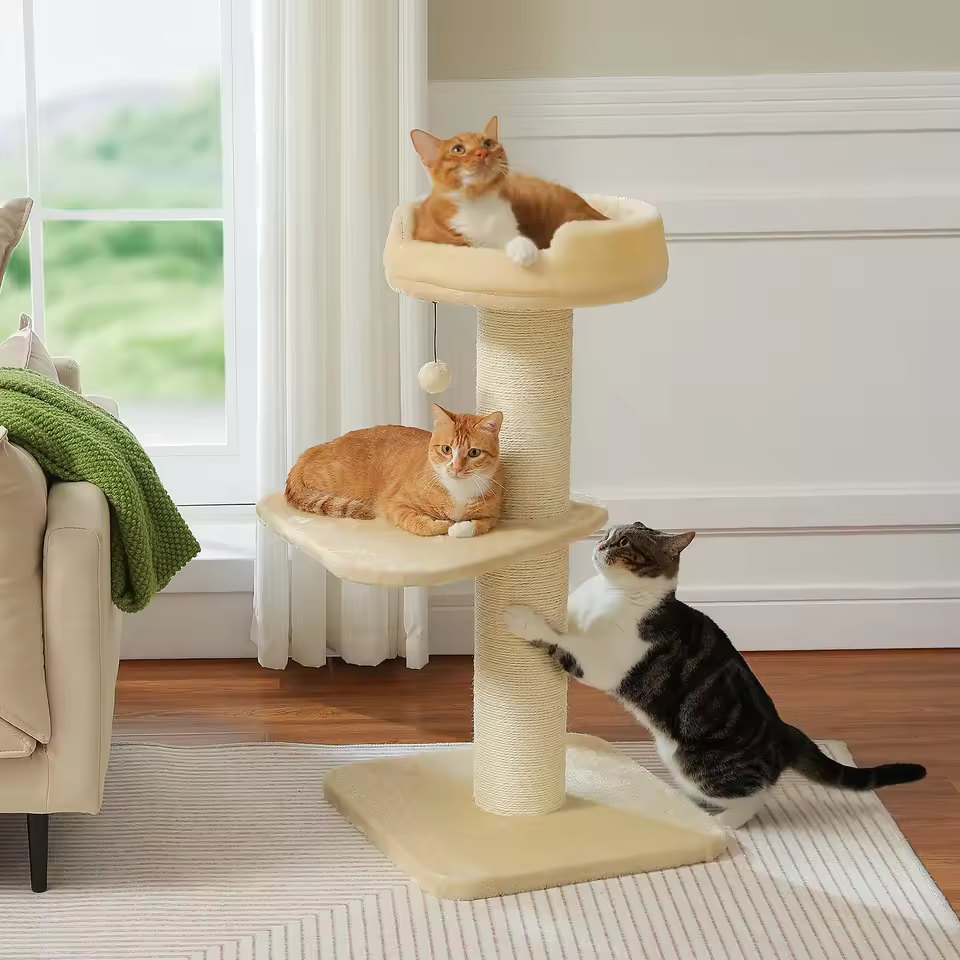
Materials Needed for Your DIY Project
Creating a functional diy cardboard cat scratcher requires a handful of easily accessible materials. Below is a detailed list of essentials and optional upgrades to ensure durability and cat appeal:
1. Cardboard Base
- Core Material: Thick, sturdy boxes (e.g., appliance or shipping crates) form the foundation. Double-layered corrugated cardboard provides better scratch resistance.
- Alternative: Stack smaller boxes or use corrugated sheets for custom shapes.
2. Adhesives
- Hot Glue Gun & Sticks: Ideal for bonding cardboard panels and reinforcing joints.
- Strong Craft Glue: Use for heavier textures like sisal rope or fabric.
3. Reinforcement Tools
- Tape: Duct tape or packing tape strengthens seams and edges. Clear packing tape works well for smooth finishes.
- Weighted Fillers: Sand, rice, or even books placed in the base add stability to tall designs.
4. Scratch-Enhancing Materials
- Scratching Surfaces:
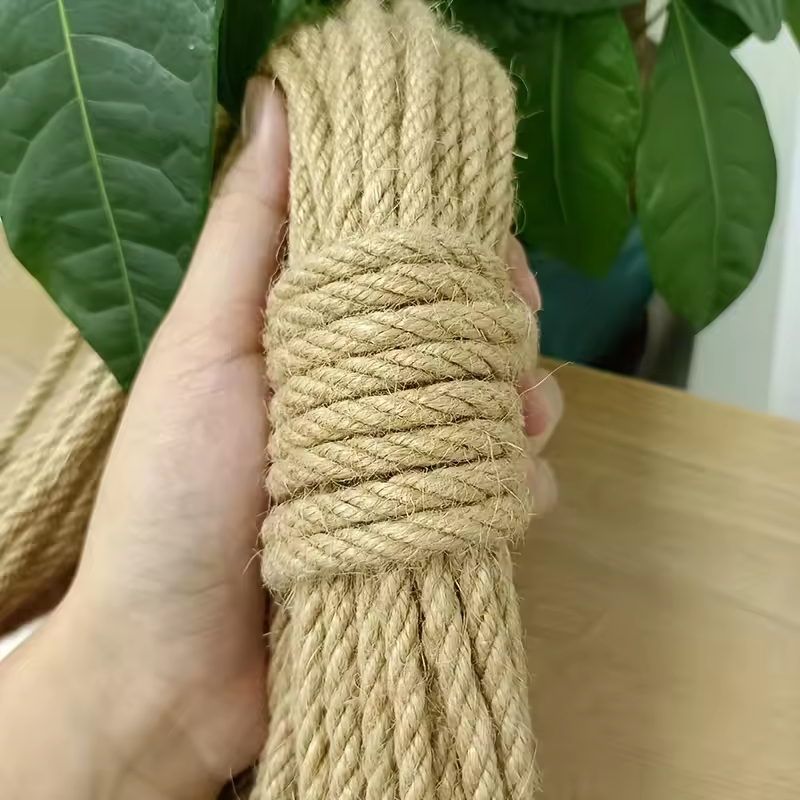
- Sisal Rope: Wrap around posts for texture cats love.
- Old Carpet: Cut scraps and glue them onto cardboard.
- Natural Wood Chips: Glue onto surfaces for a bark-like feel.
5. Decorative Elements (Optional)
- Paint or Markers: Add colors to match your decor or create patterns.
- Fabric or Burlap: Cover plain cardboard for a polished look.
- Catnip Sprinkle: Sprinkle on glued areas to attract cats.
6. Cutting Tools
- Utility Knife: For precise cuts in thick cardboard.
- Scissors: Useful for smaller pieces or rounded edges.
7. Assembly Aids
- Ruler & Pencil: Measure and mark cutting lines.
- Measuring Tape: Ensure even dimensions for multi-layered designs.
Pro Tips for Material Selection
- Budget-Friendly: Repurpose household items—use old towels for padding or cereal boxes for smaller scratch pads.
- Eco-Boost: Opt for non-toxic glue and water-based paint to keep the project safe and sustainable.
For example, a vertical cardboard cat scratcher might require a large box for the base, duct tape to reinforce joints, and sisal rope wrapped around the central post. Meanwhile, a flat scratch pad could use a single cardboard sheet coated with carpet remnants.
By gathering these materials, you’ll be ready to craft a durable, cat-approved scratcher tailored to your space and budget. Always prioritize sturdy cardboard and reinforced edges to extend the project’s lifespan.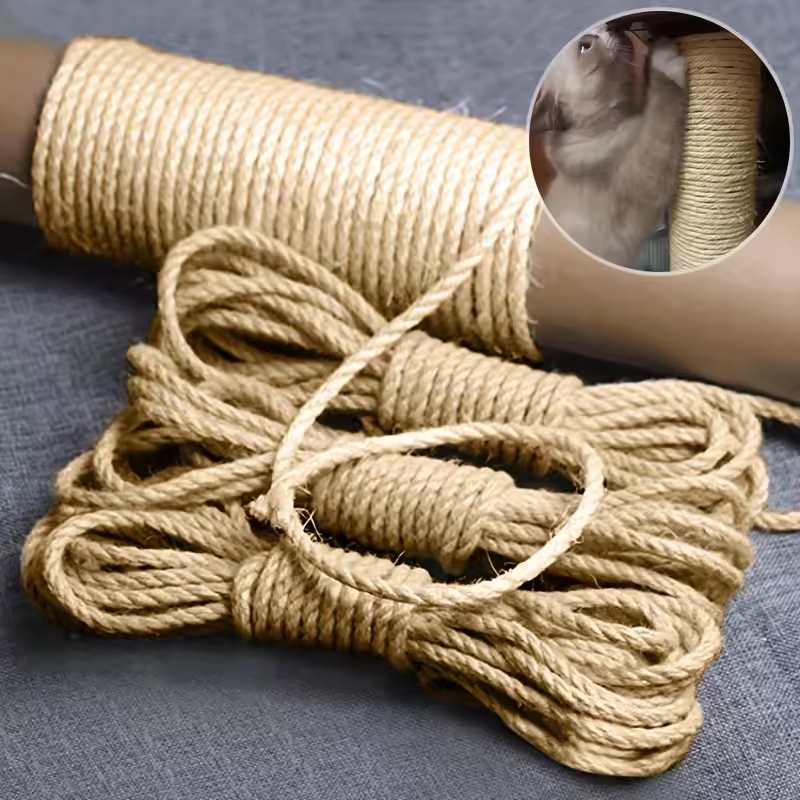
Step-by-Step Guide to Building a Cardboard Cat Scratcher
Follow this concise guide to create a functional diy cardboard cat scratcher tailored to your cat’s needs:
1: Gather Materials
Collect:
- A large cardboard box (e.g., appliance-sized).
- Hot glue gun, scissors, duct tape, and sisal rope.
- Optional: Paint, catnip, or weighted filler (sand/rice).
2: Design Your Base
- Vertical Tower: Cut the box into three panels to form a triangular or rectangular tower.
- Flat Pad: Use a single cardboard sheet for a compact scratch surface.
3: Assemble the Structure
- Fold panels into your chosen shape. Use hot glue to secure corners, reinforcing joints with duct tape.
- For towers, stand panels upright and glue them to form a stable base.
4: Add Stability
- Place weights (sand, books) inside the base for a sturdy foundation.
- Reinforce edges with tape to prevent fraying.
5: Enhance the Scratching Surface
- Texture Option 1: Wrap sisal rope around the tower or pad, gluing it in place.
- Texture Option 2: Glue carpet scraps or wood chips onto the cardboard.
- Optional: Sprinkle catnip onto glued areas for extra appeal.
6: Decorate (Optional)
- Paint designs or patterns using non-toxic paint.
- Add paw-shaped cutouts or dangling toys for stimulation.
7: Test & Position
- Place the cardboard cat scratcher near areas your cat frequents (e.g., sunny windowsills).
- Encourage use by sprinkling catnip or rubbing it with a toy.
Example Build: Mini Tower
- Cut a box into three panels, each 12″ wide.
- Form a triangular tower, securing joints with glue and tape.
- Wrap sisal rope around the central post.
- Fill the base with sand for weight.
Troubleshooting Tips
- Wobbly Structure? Add more filler or reinforce with additional tape.
- Cat Avoidance? Place near their favorite scratching spot or add more catnip.
This guide ensures a simple, customizable project that’s ready in under two hours. Adjust dimensions and textures to suit your cat’s preferences!

Creative Design Variations for Every Cat’s Preference
A well-designed diy cardboard cat scratcher adapts to your cat’s personality. Here are tailored ideas to suit diverse preferences:
1. Vertical Tower:
Climbing enthusiasts thrive with multi-level platforms. Stack boxes into a triangular tower, adding sisal rope for grip. A perched viewing area at the top boosts appeal.
2. Flat Scratch Pad:
Ideal for kittens or small spaces, this compact design uses a single cardboard sheet. Score the surface with a knife or glue on carpet scraps for texture.
3. Maze Scratcher:
Create tunnels and hidden scratching posts within a large box. Cats love exploring enclosed spaces—add dangling toys for extra stimulation.
4. Window Perch Combo:
Attach a cardboard cat scratcher to windowsills using L-brackets. Add a sunbathing platform and sisal-wrapped post for a functional daybed.
5. Modular Units:
Build detachable sections (e.g., scratch pads, towers) to rearrange based on your cat’s evolving interests.
6. Textured Surprise:
Mix materials—glue wood chips to one area, sisal rope to another, and leave cardboard exposed. Let your cat choose their preferred texture.
7. Compact Corner Unit:
Fold a box into an L-shape for a scratch post and resting nook. Perfect for apartments, it combines functionality with space efficiency.
For example, an adventurous cat might enjoy a maze-style diy cardboard cat scratcher with hidden compartments, while a lazy cat prefers a sunlit window perch.
These variations prove that creativity knows no bounds—tailor the design to your cat’s quirks, ensuring it becomes their new favorite spot!
Troubleshooting Common DIY Challenges
Building a diy cardboard cat scratcher often involves minor hurdles, but most can be resolved with simple fixes:
Structural Weakness:
If your tower wobbles, reinforce joints with extra hot glue or duct tape. Add a weighted base (filled with sand or rice) to prevent tipping. For large designs, stack multiple boxes vertically and secure them with L-brackets.
Cats Avoiding the Scratcher:
Sprinkle catnip onto glued surfaces or rub the cardboard cat scratcher with a toy your cat loves. Place it near their preferred scratching spot to redirect their behavior.
Surface Wear:
To extend lifespan, cover high-traffic areas with sisal rope or carpet scraps. Reapply glue to frayed edges and reinforce scratched spots with packing tape.
Assembly Difficulty:
Use a ruler to score cardboard before cutting for cleaner edges. Pre-measure and mark joints to ensure alignment.
Aesthetic Concerns:
Cover plain cardboard with fabric or wallpaper. Paint with non-toxic acrylics to match your decor.
Moisture Issues:
Avoid placing near water bowls. If dampness is a problem, line the base with waterproof plastic.
For example, if a vertical diy cardboard cat scratcher leans, add triangular cardboard braces between panels. If your cat ignores it, try dangling a feather toy from the top.
These solutions ensure your project remains functional and durable. Remember—cardboard’s flexibility allows easy repairs or redesigns, so adapt as needed!
Maintenance & Longevity Tips for Your Cardboard Creation
Maximizing the lifespan of your diy cardboard cat scratcher requires proactive care. Follow these strategies to extend its durability and functionality:
Regular Inspections:
Check joints, edges, and scratching surfaces weekly. Address loose tape or frayed cardboard immediately with hot glue or reinforced duct tape.
Gentle Cleaning:
Wipe dust with a damp cloth. For stains, mix mild dish soap with water—avoid soaking cardboard. Dry thoroughly to prevent mold.
Spot Repairs:
Reapply glue to worn areas. Cover heavily scratched zones with new layers of cardboard or sisal rope. Reinforce corners with triangular braces cut from extra cardstock.
Strategic Placement:
Keep the cardboard cat scratcher away from direct sunlight (to prevent drying) and moisture sources like pet bowls. Rotate its orientation to distribute scratching evenly.
Weight Management:
For towers, periodically check the base’s stability. Add more sand or rice if it wobbles.
Creative Upgrades:
Refresh interest by adding new textures (e.g., glued-on wood chips) or dangling toys. Paint over dull areas with non-toxic acrylics for a fresh look.
Disassembly Plan:
When heavily worn, disassemble the structure. Recycle or compost cardboard scraps, then rebuild with upgraded designs.
For example, reinforce a sagging tower by stacking an extra box at the base. If your cat targets one side excessively, rotate it so the worn area faces a wall.
These steps ensure your diy cardboard cat scratcher remains a functional, eco-friendly fixture. Embrace repairs as part of the project’s lifecycle—cardboard’s flexibility allows endless reinventions!
Conclusion: Embrace Sustainability with DIY Cat Furniture
The diy cardboard cat scratcher embodies the power of creativity and sustainability, proving that eco-conscious choices needn’t sacrifice functionality or style. By repurposing discarded cardboard—often destined for landfills—this project reduces waste while providing cats with natural scratching surfaces that mimic their instincts.
Its affordability and adaptability make it accessible to all pet owners, whether crafting a vertical tower or a compact scratch pad. The ability to customize textures, sizes, and aesthetics ensures harmony with both your cat’s needs and your home’s decor.
Even when worn out, the cardboard cat scratcher decomposes faster than plastic alternatives, closing the loop on a sustainable lifecycle. Its modular design allows easy repairs or reinventions, extending its utility beyond a single iteration.
Choosing this project isn’t just about saving money—it’s a step toward reducing environmental footprints. As more owners embrace DIY, we shift toward a culture where pets’ needs and planetary health coexist.
Start today: Transform trash into treasure with your own diy cardboard cat scratcher. Every handmade creation is a vote for a greener future—one cardboard box at a time.